Datalog+/- notebooks
Notebooks are great storytelling devices, allowing you to interleave Markdown elements like images, math equations, and explanatory text with your code and its execution results. Notebooks can be a perfect way to share and explain your ideas.
They make also great REPLs (read-eval-print loop), interactive applications where you can write a few lines of code and execute the code immediately and see the output, keeping the results along the way.
Vadacode supports Datalog+/- notebooks, which allow for the interactive use of Datalog+/-.
Datalog+/- notebook experience may be different from what you may expect from a language like Python. In particular, in Datalog+/- Notebooks the execution of each cell is independent from the others (no volatile results are persisted between executions). For example, if you assign an atom in a cell, it does not become available in other cells. Nevertheless, you can do sequential processing by explictly persisting data using @input, @output and @bind statements.
|
Create or open a Datalog+/- Notebook
You can create a Datalog+/- Notebook by running the Vadacode: Create notebook command from the Command Palette (⌘+Shift+P on macOS or Ctrl+Shift+P on Windows/Linux) or by creating a new .vadanb file in your workspace.
If you have an existing Datalog+/- Notebook, you can open it by right-clicking on the file and opening with VS Code, or through the VS Code File Explorer.
Running cells
Vadacode notebooks send requests to the endpoint specified in the Reasoner endpoint setting.
|
Run a single code cell
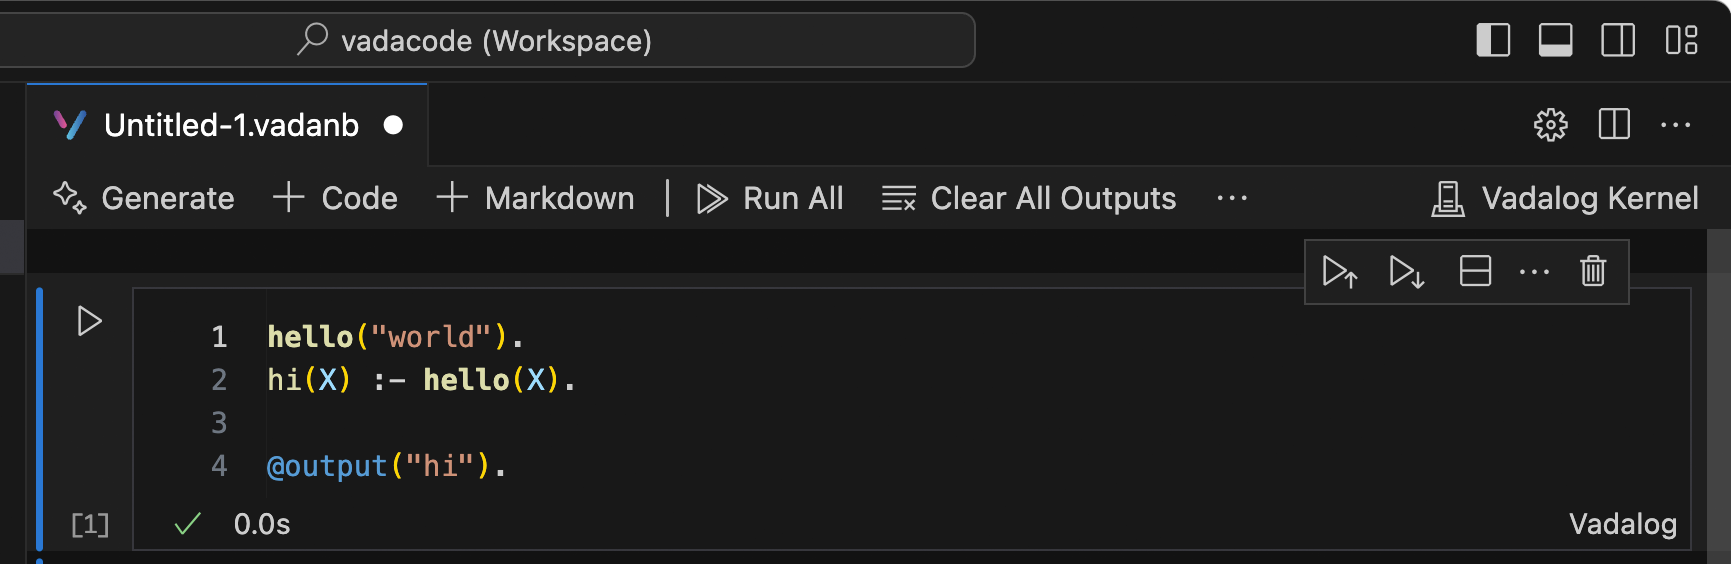
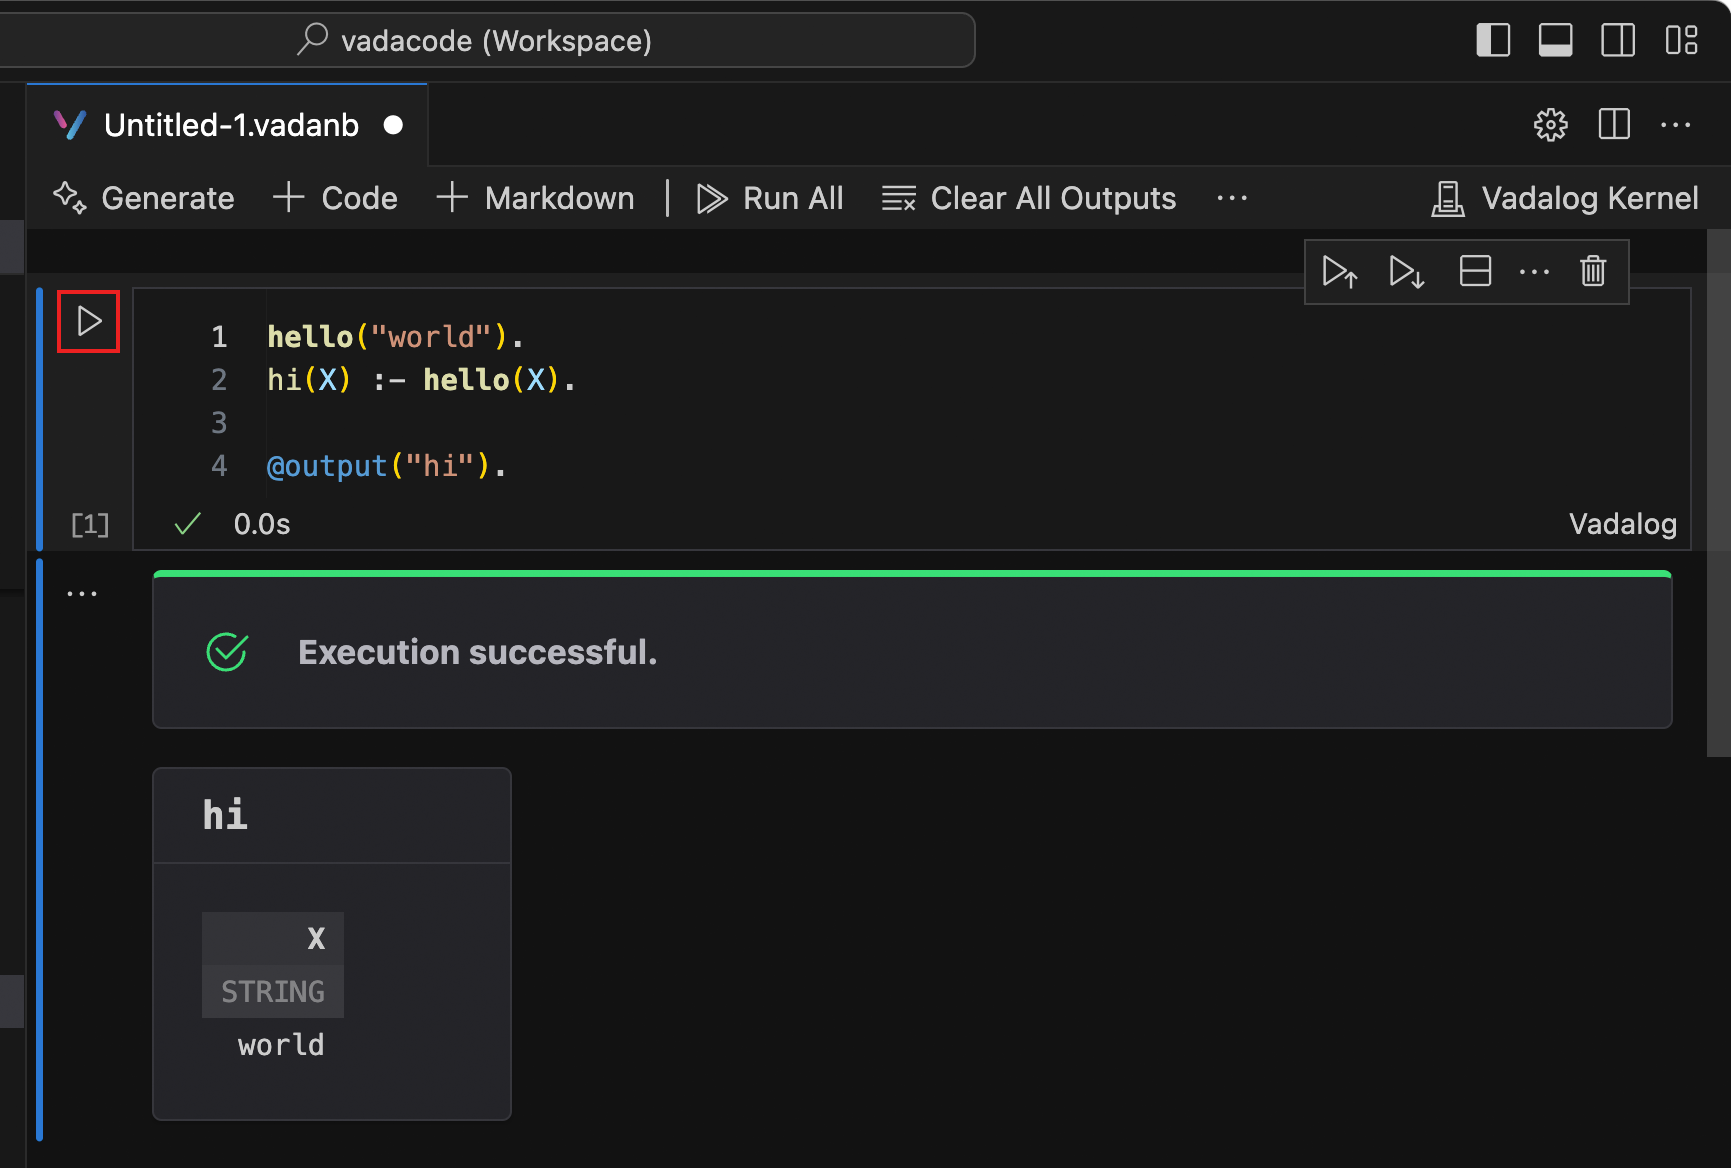
Once your code is added, you can run a cell using the Run icon to the left of the cell and the output will be displayed below the code cell.
To run a selected code cell, you can also use keyboard shortcuts in both command and edit mode. Ctrl+Enter runs the currently selected cell. Shift+Enter runs the currently selected cell and inserts a new cell immediately below (focus moves to new cell). Alt+Enter runs the currently selected cell and inserts a new cell immediately below (focus remains on current cell).
Run multiple code cells
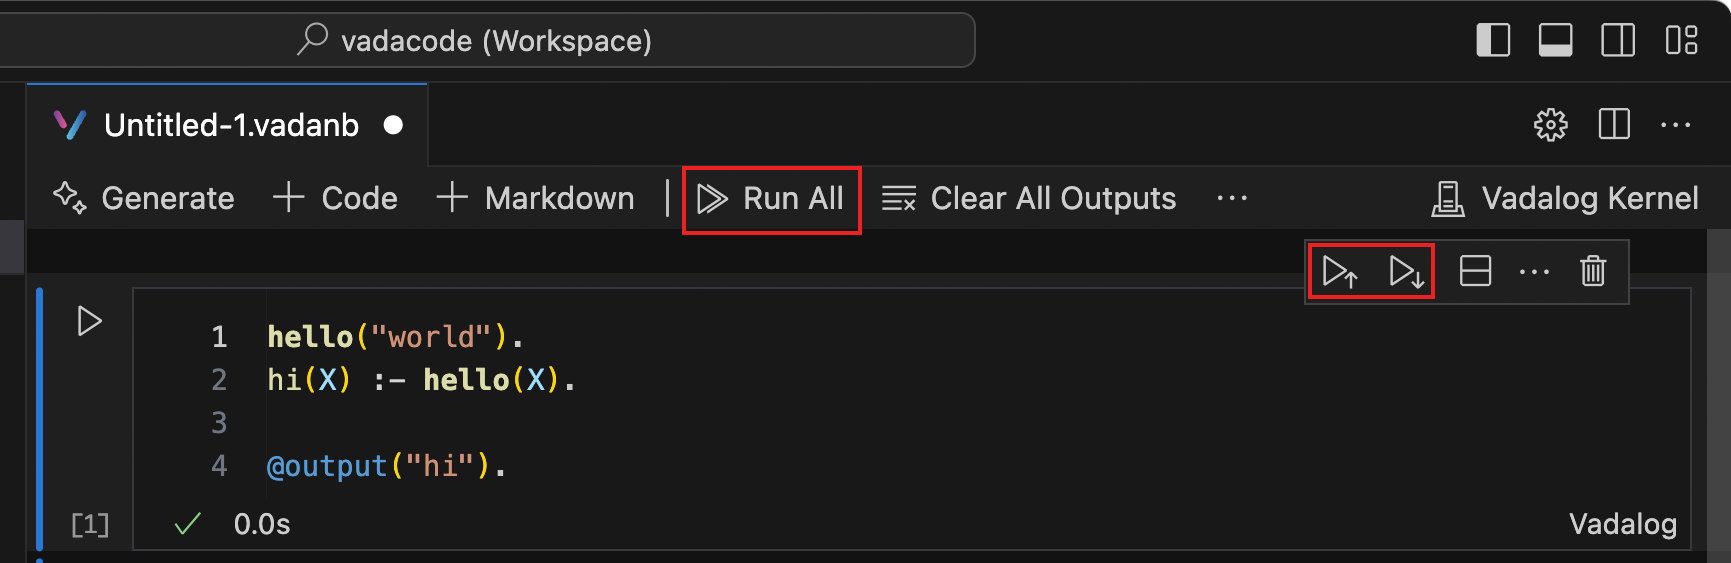
Running multiple code cells can be accomplished in many ways. You can use the double arrow in the main toolbar of the Notebook Editor to run all cells within the Notebook or by selecting Run All Above or Run All Below buttons of the current code cell.
IntelliSense support in the Datalog+/- Notebook Editor
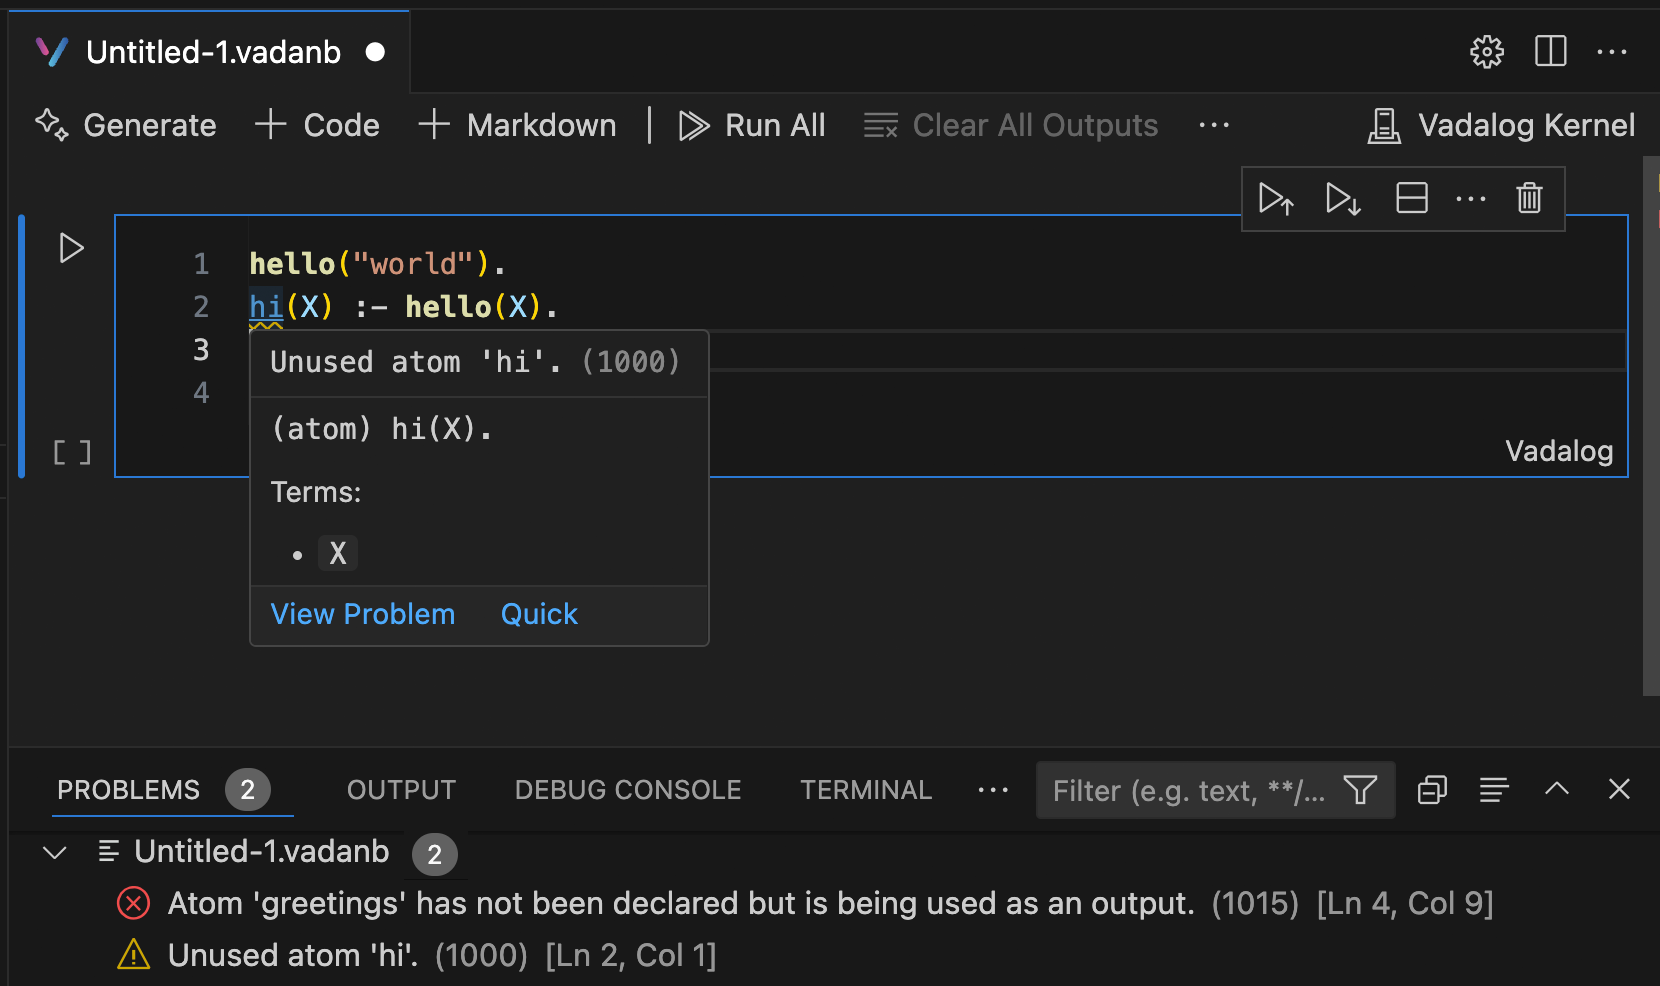
The Datalog+/- Notebook Editor window has full IntelliSense - code completions, member lists, quick info for methods, and parameter hints. You can be just as productive typing in the Notebook Editor window as you are in the code editor.
Further information
Further information about Visual Studio Code notebooks and a full usage guide can be found at Jupyter Notebooks in VS Code.